Click here if you’re looking for custom cookies for your event, party or wedding?
15
June
Guest Post: White Chocolate Giant Cupcake with Dark Chocolate Case
Today’s guest post is from my slightly insane sister-in-law, Dawn. We are a lot alike, in that we share a love of cake, hair dye, and nutella. Dawn has become quite the dab hand at producing giant cupcakes, and they are always well received at family gatherings. She has kindly written out a tutorial including the recipe she uses, plus a few pointers and photos.
White Chocolate Giant Cupcake with Chocolate Case
 Print recipe
Ingredients
Cupcake
- 227g Unsalted Butter (softened)
- 110g Good Quality White Chocolate (melted and cooled)
- 400g Caster Sugar
- 5 Large Free-range Eggs
- 440g Plain Flour
- 2 teaspoons Baking Powder
- 1 teaspoon Salt
- 315ml Single Cream
- 1 tablespoon Vanilla Extract
Chocolate Case
- 300g Dark Chocolate
Directions
| 1. | Pre-heat the oven to Gas Mark 3 / 160°C / 325°F | |
| 2. | Lightly grease a giant cupcake pan (cake release spray works brilliantly) | |
| 3. | In a large bowl, beat the butter until creamy, then stir in the chocolate | |
| 4. | Add the sugar and beat for 5 minutes until light and fluffy. Scraping down the sides of the bowl regularly | |
| 5. | Add the eggs one at a time, beating well between each addition | |
| 6. | In a separate bowl, sift together the flour, baking powder and salt | |
| 7. | Gradually add the dry ingredients to the bowl while mixing at low speed alternating with the cream | |
| 8. | Stir in the vanilla extract, and any colouring if you are using it | |
| 9. |
Spoon the batter into the prepared pan, spreading up to the edges of the pan from the centre, so that the batter is lower in the middle to reduce doming | 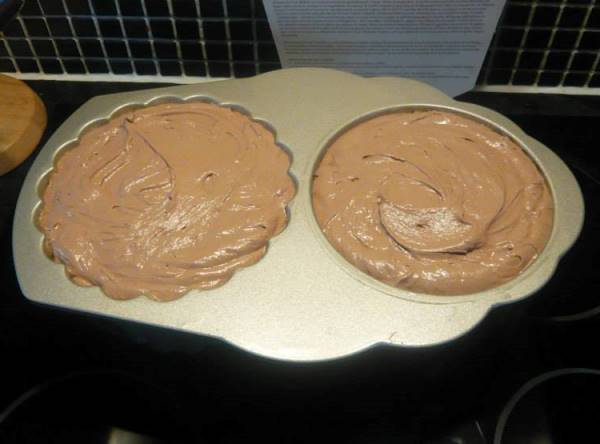 |
| 10. | Bake for 65-75 minutes until a toothpick inserted comes out clean (this timing may vary from oven to oven so check every 10 mins after the initial 65 mins. Be aware the 2 halves bake at different rates but don’t worry if the top of one goes a little cajun as you’ll be trimming this off and the cake won’t be dry) | |
| 11. |
Remove from oven and cool in the pan for 10 minutes, Trim off any excess cake to create a nice even surface while the cake is still in the pan, then invert on to a cooling rack and cool completely. | 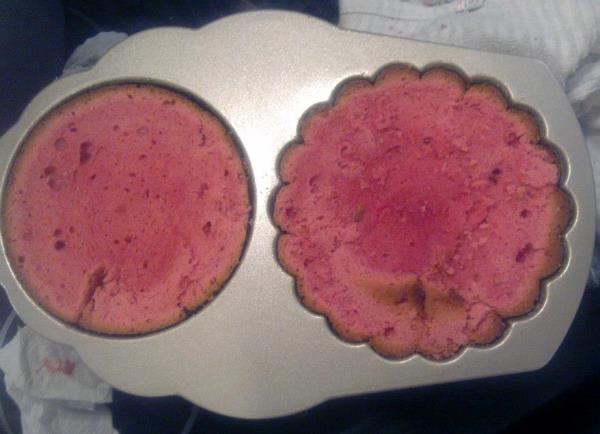 |
| 12. | As the cake cools, make the chocolate case. Place the cupcake mould in the freezer for 10 minutes while you melt your dark chocolate | |
| 13. |
Spread a thin layer of the melted chocolate inside the bottom section of the cupcake mould using a pastry brush | 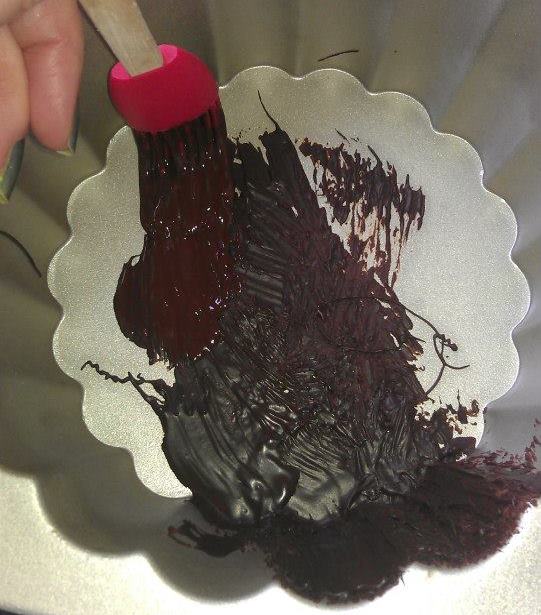 |
| 14. | Once completely covered, place the pan in the fridge for a few minutes to harden | |
| 15. | Repeat this process 3 or 4 times, depending on the thickness of each coat | |
| 16. | Gently pull the case from the mould ( the case will not come out of the mould unless enough layers of chocolate have been completed. Don’t ask me why, but the chocolate knows when you’ve done enough, its magic) | |
| 17. |
Gently push the bottom half of the cupcake into the chocolate case. Sandwich the top half onto the base with buttercream, or chocolate spread and cream. | 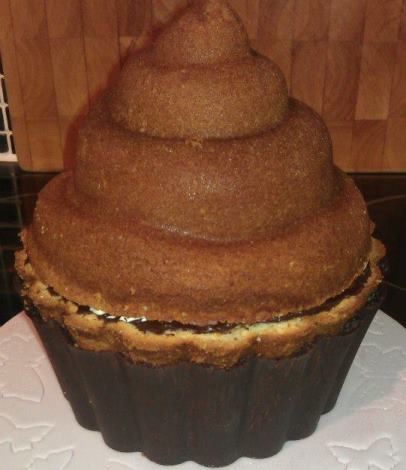 |
| 18. |
Decorate the top of the cupcake with piped buttercream | 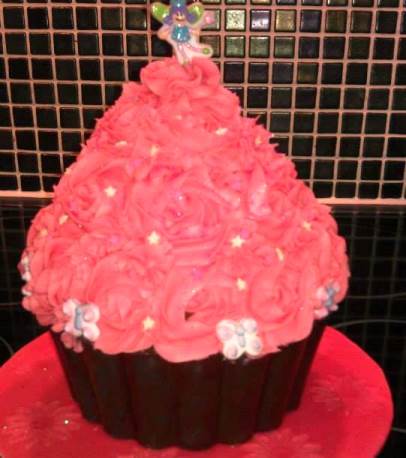 |

Quick question when is the cream added?
never mind, I just found it 🙂