Click here if you’re looking for custom cookies for your event, party or wedding?
13
May
Halloween Pumpkin Cushion Cover
My sister, like me, believes that Halloween is not a holiday, it’s a lifestyle. Her birthday is in early May, so along with the birthday cake I made her, I decided to make her a Halloween Pumpkin Cushion Cover in a homemade folk art style. As unseasonal as you may think it is, I knew she would love it, as did I. In fact, I was so pleased with it, I have decided to make one for myself.
Materials
- Various Halloween themed fabrics
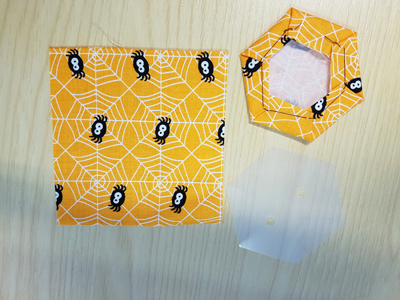
- Hexagonal plastic templates
- Black cotton fabric
- Black cotton thread
- Needles
- Quilting batting
- Dressmaking pins
- Sharp Scissors
- 18″ / 46cm zip
Instructions
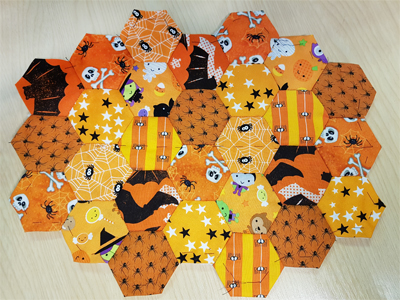
| First plan out the layout of your patchwork. Feel free to use this template I have created – all you have to do is create a key and assign a pattern to each letter. If you are doing your own layout, letter or number each of the hexagons until you are happy with the pattern, and that no two hexagons of the same design are next to each other. You can either keep the pattern completely random, or create a repeating pattern.
Once you know how many hexagons you need of each design, cut your patchwork material into 3.5″ / 9cm squares. Pin one of the 2.5″ / 6cm hexagon templates in the centre. Using some black cotton, tack the edges of the material around the template. |
 |
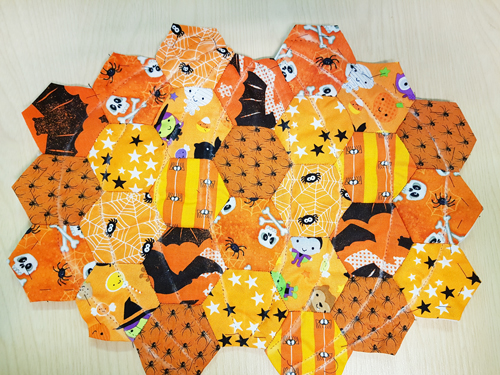
| Place two of the hexagons face to face. Using a small needle and overcast stitches as small as you can make them, and join the two pieces together. Repeat this process, placing hexagons face to face, and stitching together until you have your entire pumpkin shape. Remove all the plastic templates
Lay the pumpkin over some batting and tack around the edge, and across the middle horizontally. Once you have done this, cut the excess batting off. |
 |
| Use a piece of tailor’s chalk, draw a line straight from the top to the bottom to mark the middle line. Now draw curved lines to represent the sections of a squash, keeping it as symmetrical as possible. Using small running stitches, with a back stitch roughly every 10 stitches, follow the chalk lines to quilt the pumpkin and batting together.
Once you have stitched all your pumpkin lines, pull out the tacking stitches
|
 |
| Cut out 2 eye shapes out of black material, along with a triangular nose, and a jagged mouth. Pin them in position and use an overcast stitch to attach them to your pumpkin. Don’t worry too much a bit the slightly frayed edges of the cushion as you want this to look like homemade folk art | 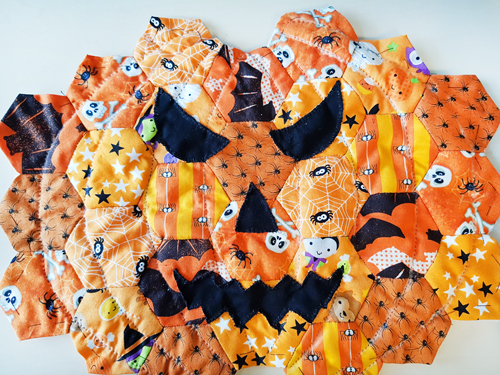 |
| For an 18″ cushion pad, cut a piece of black material 19″ / 48cm square. Place the quilted pumpkin in the centre. Use pins to hold it in place, then using an overcast stitch, attach it to the black material. Now cut a second 19″ square, either in black or in a Halloween patterned material, and place this face to face with your pumpkin piece. Using a backstitch, sew three sides together with a ½” seam. | 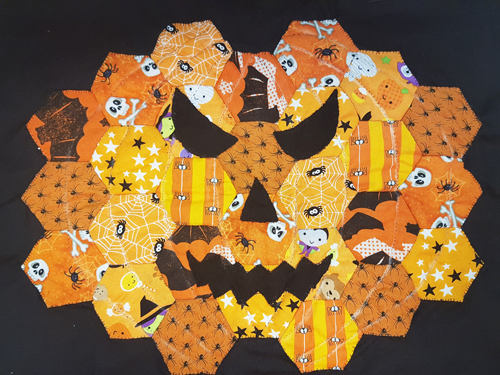 |
| On the fourth side, position an 18″ / 46cm zip, and pin in place. Sew the zip into place. Turn the cover the right way out, place the cushion pad in, and zip up. Place the cushion pad inside, and your cushion is finished. | 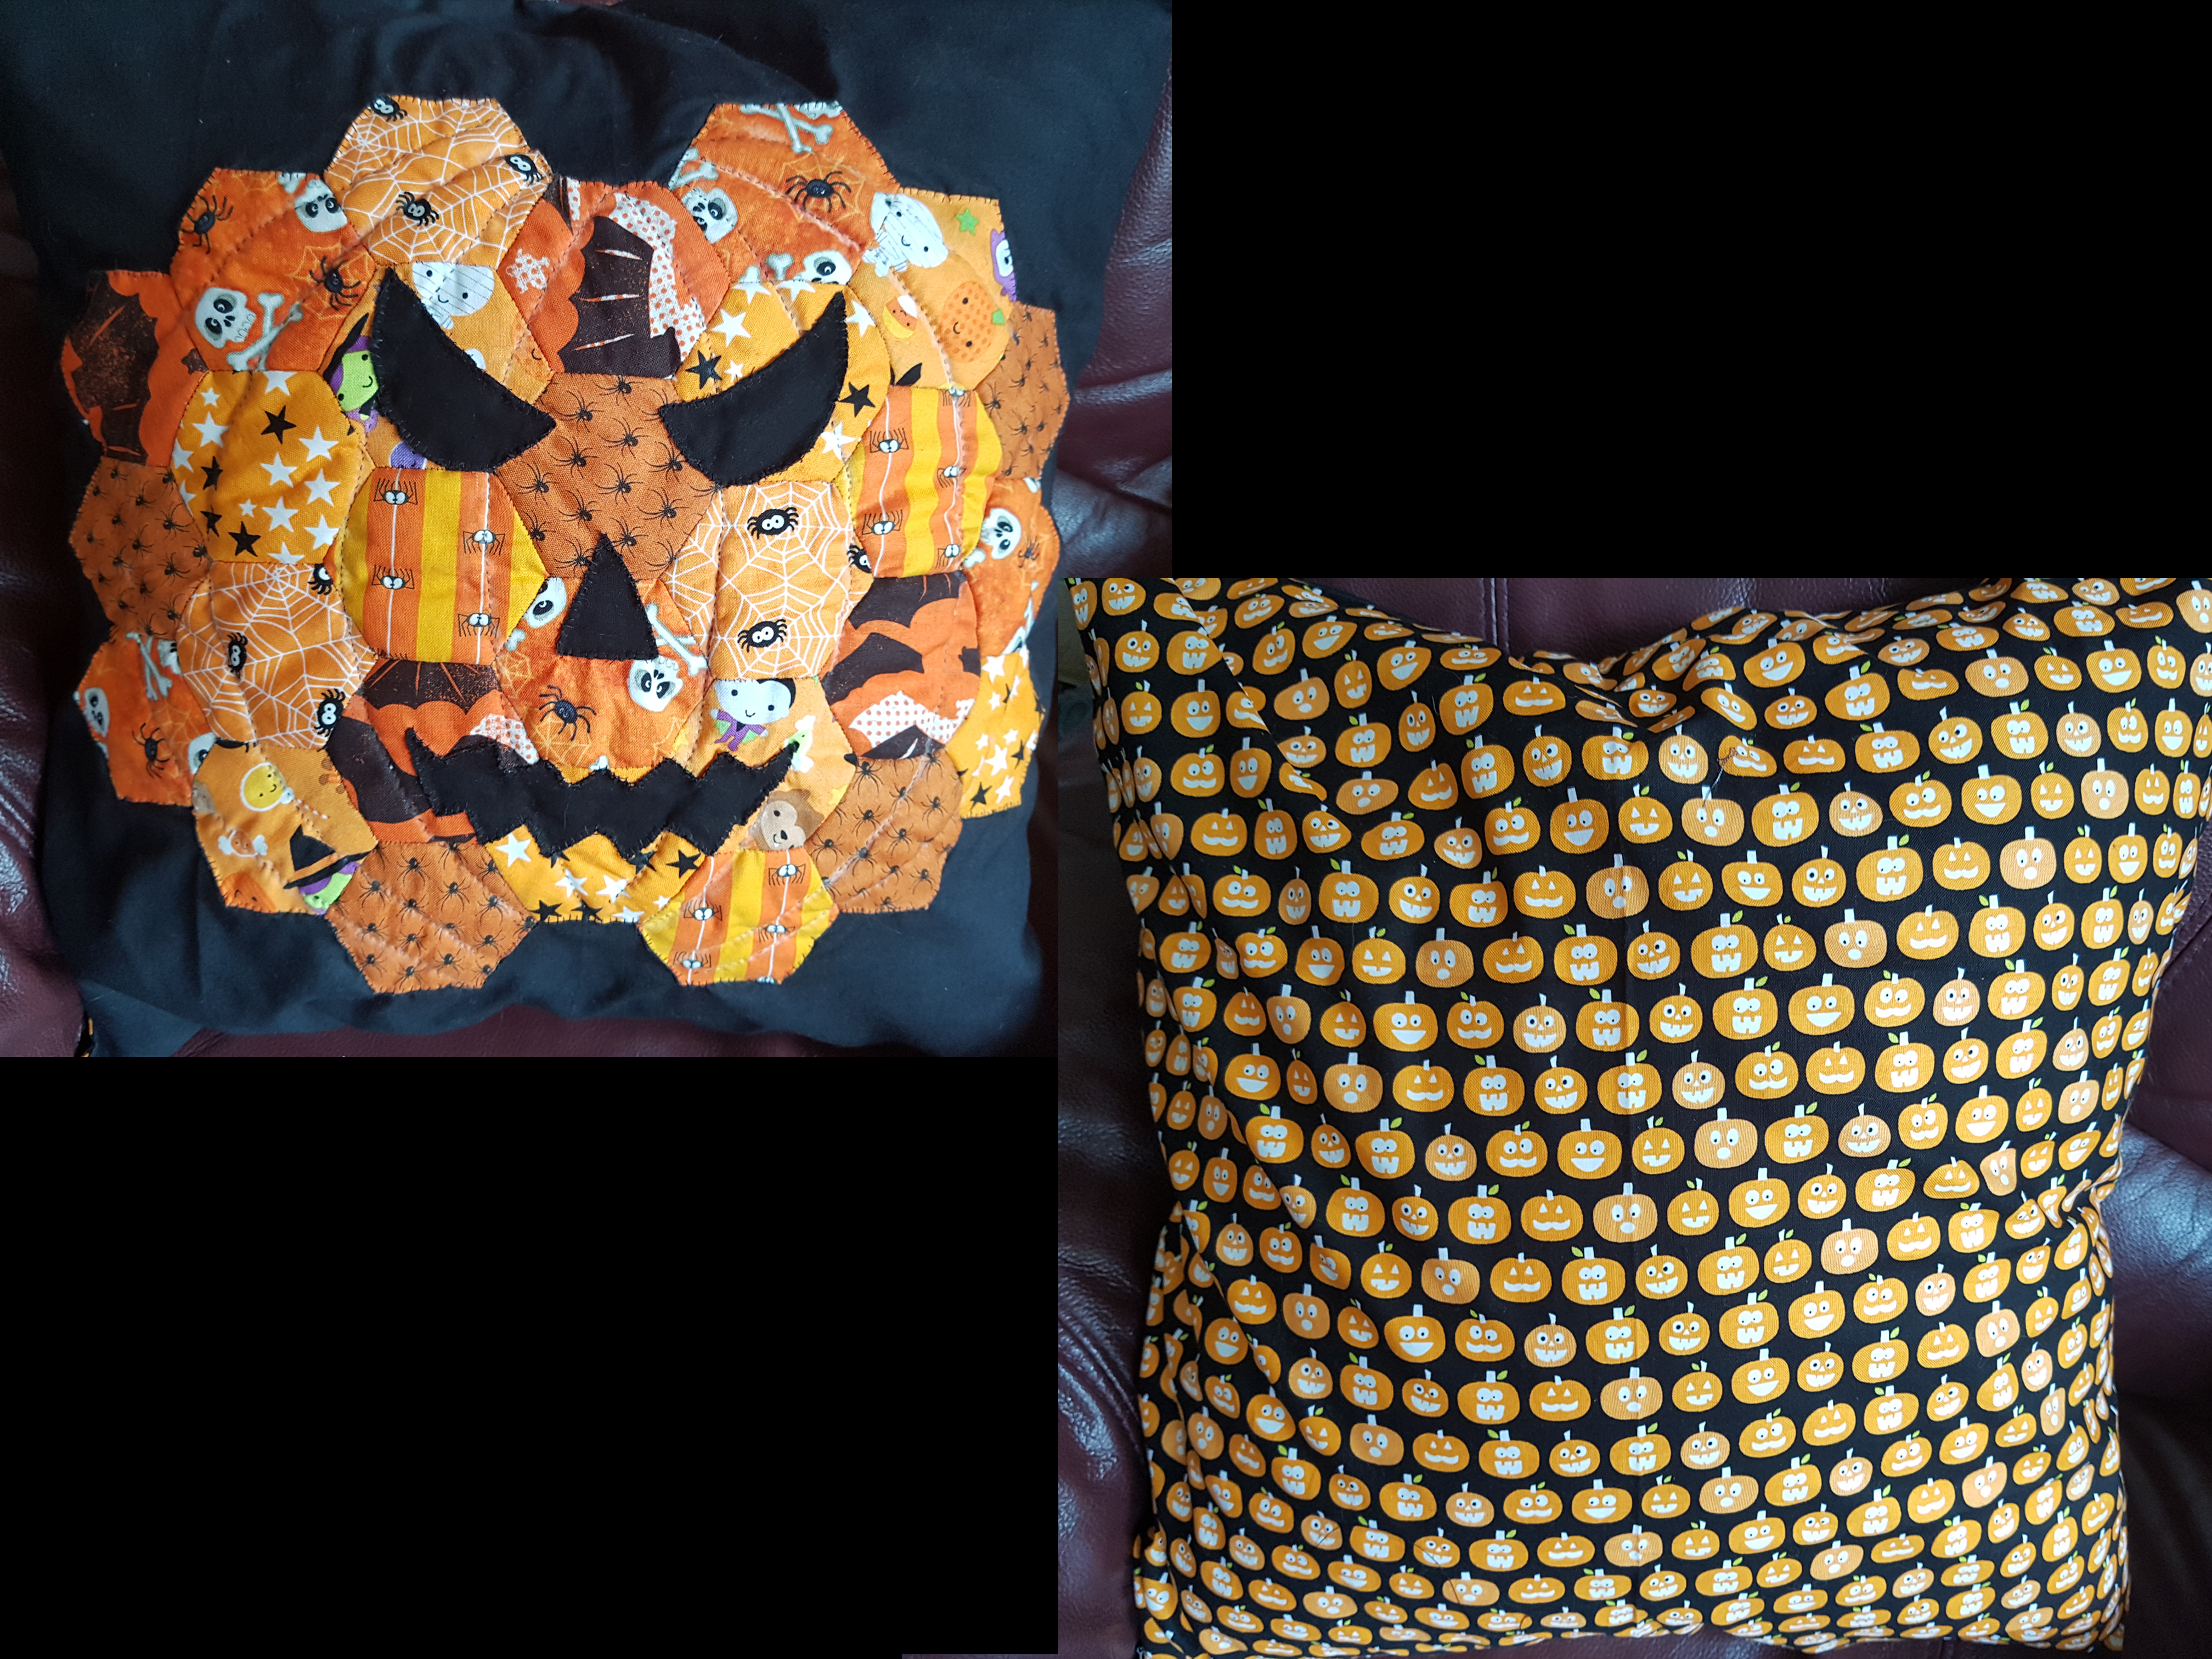 |

Leave me a comment...