Click here if you’re looking for custom cookies for your event, party or wedding?
6
July
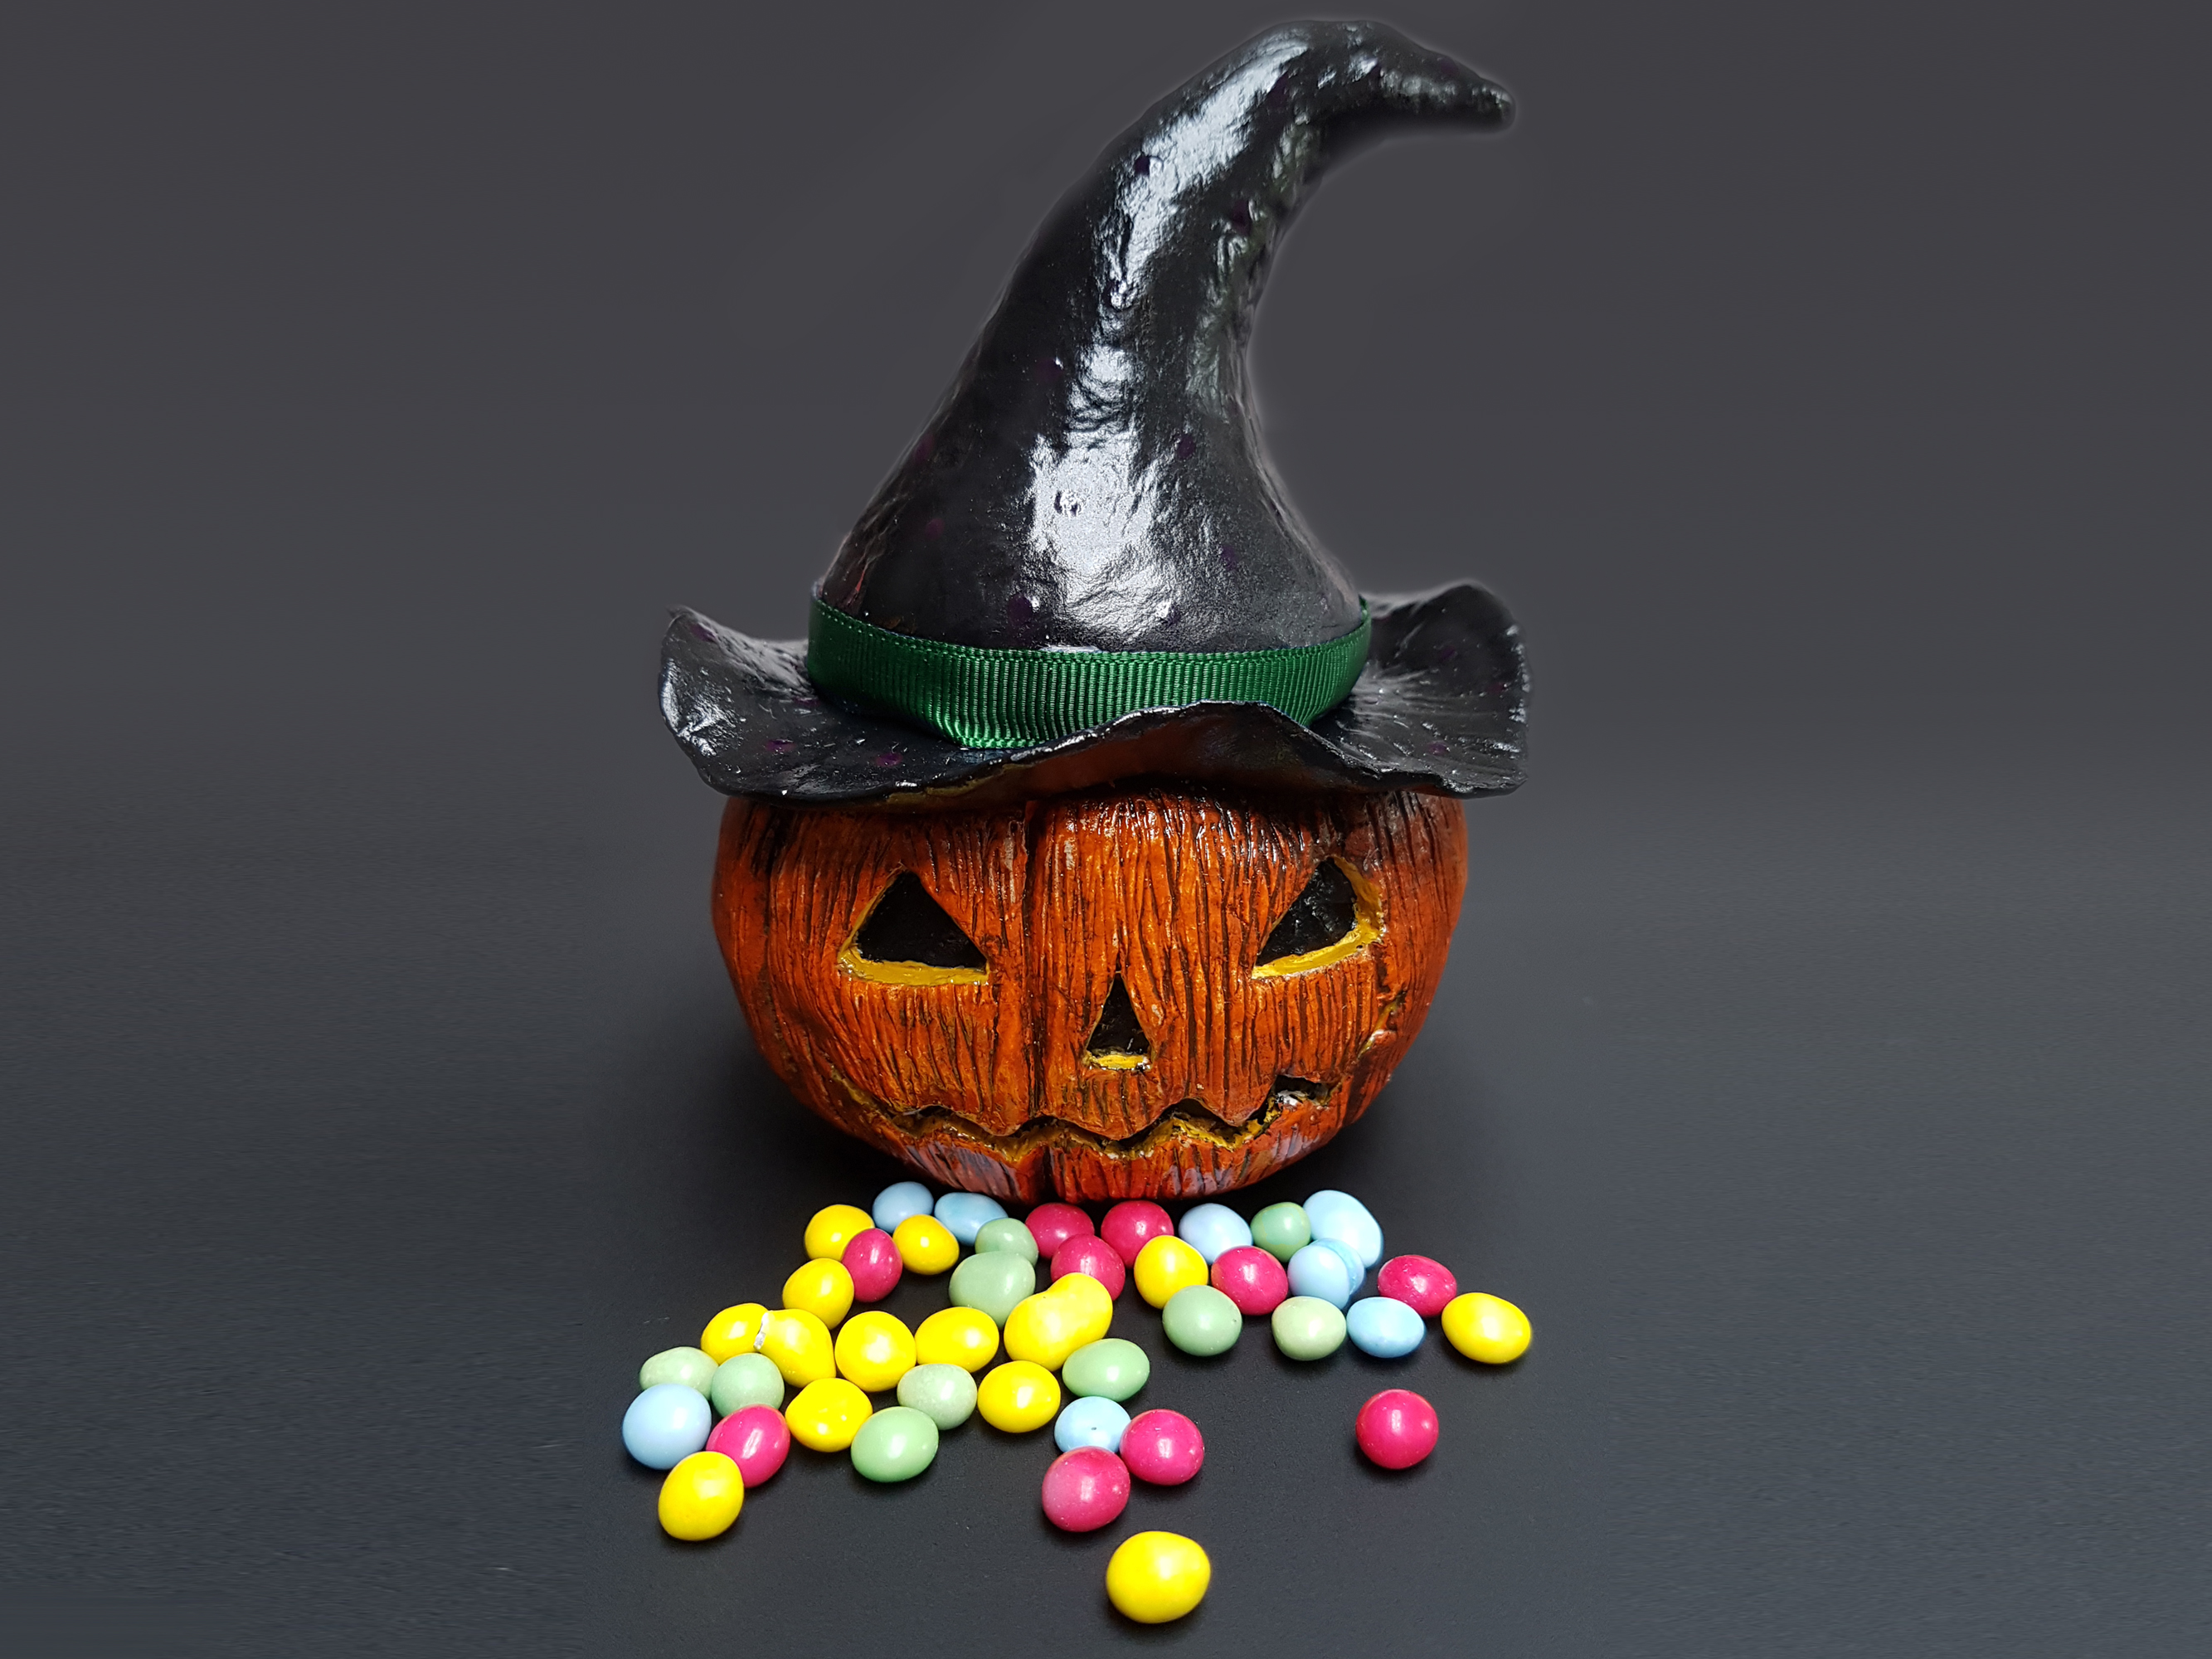
Pumpkin Jar
In a previous post, I turned an old jar into a fairy house tea light holder. This time, I turned a very small jar (100ml) into a witchy pumpkin jar. You can fill the jar with sweets and it would make an excellent gift for Halloween, or anytime of year… if you know someone who is as mad about Halloween as I am.
Materials
- Small jar, cleaned and any labels removed
- Foil
- Hot glue & gun
- Plain flour & water
- Salt
- Air dry clay
- Modelling tools
- Orange acrylic paint
- Black acrylic paint
- Brown acrylic paint
- Yellow acrylic paint
- sealant spray
- green ribbon
Instructions
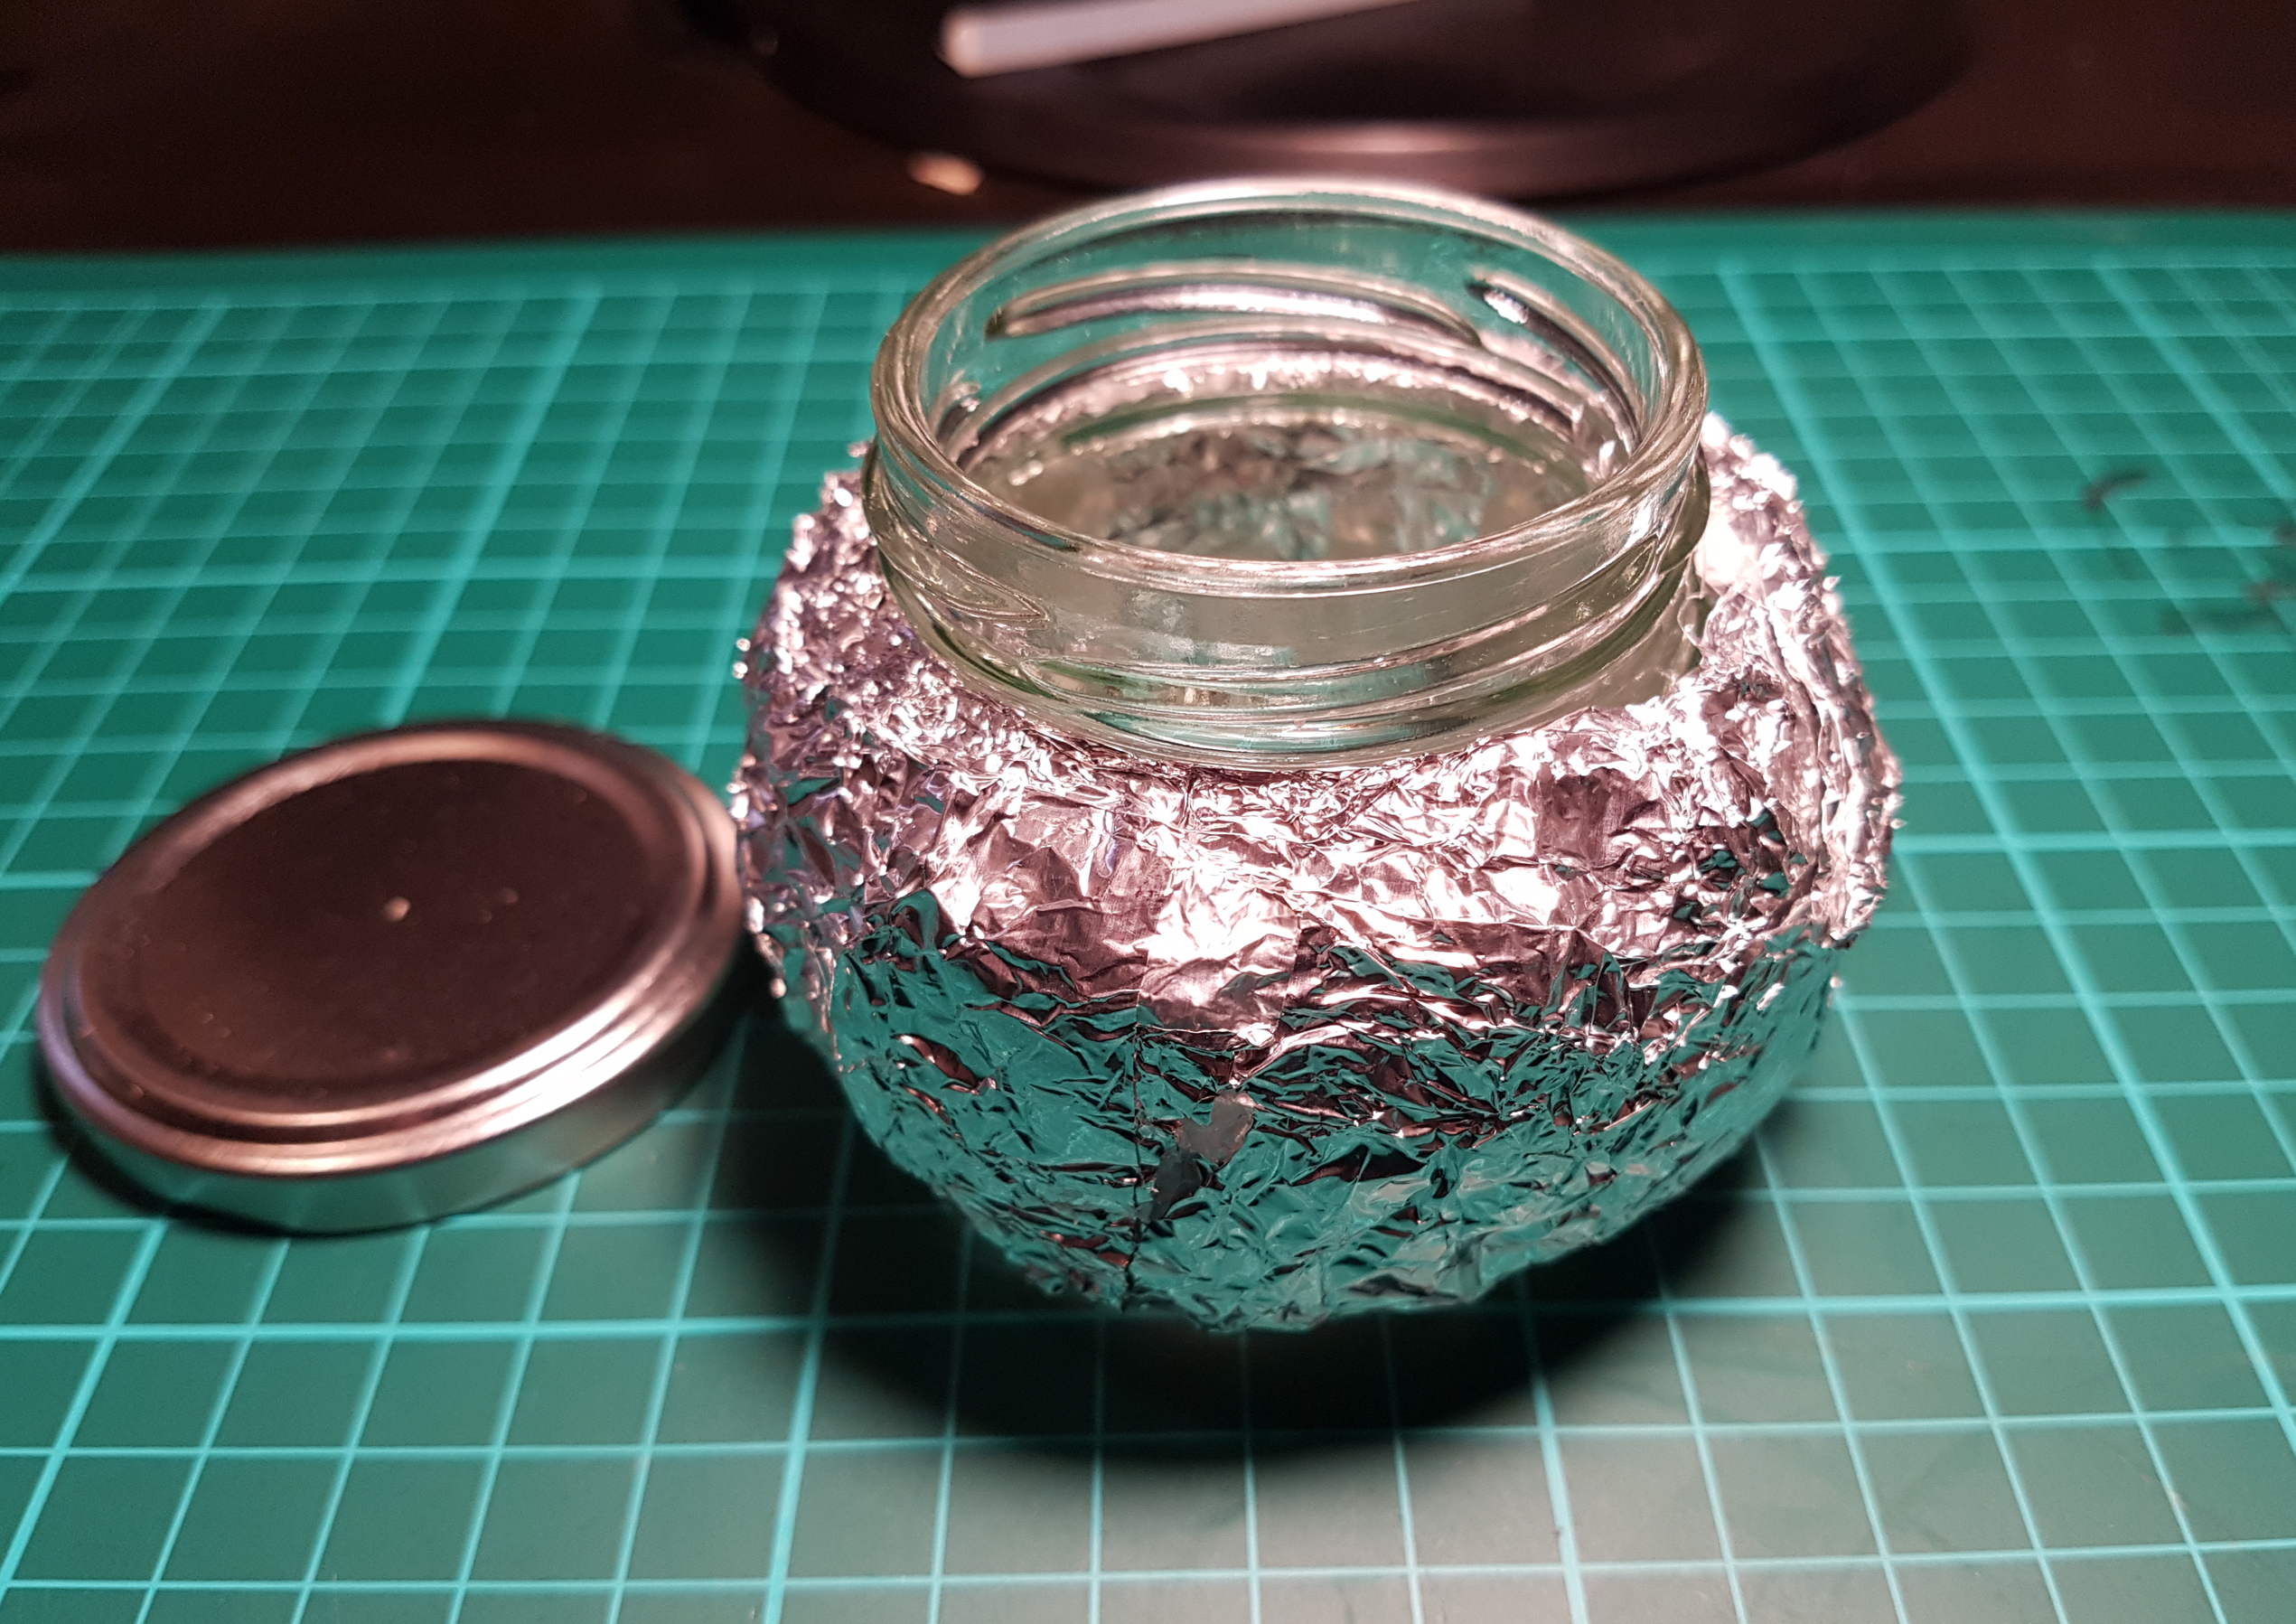
| Take some large pieces of foil and scrunch it around the jar. Using the glue gun, attach the foil to the glass.
Add more foil if needed until you have a slightly rounded shape around the jar. Press the foil with the pad of your thumb to try and smooth out any of the larger lumps and bumps |
 |
| Mix 2 tablespoons of plain flour and 2 tablespoons of water, and then 1 teaspoon of salt (to prevent mould) and mix until you have a glue like consistency with no lumps. Tear strips of newspaper, then tear those strips into small lengths, about 5cm. Drop the pieces of paper into the flour glue and leave to soak for a few minutes. Carefully add a piece at a time around the jar until the foil is completely covered. Add more paper if there are any areas that need to be evened or smoothed out. Sit the jar on its top for at least 24 hours to ensure that it is fully dried. This will provide a paintable surface for when you cut away the clay later | 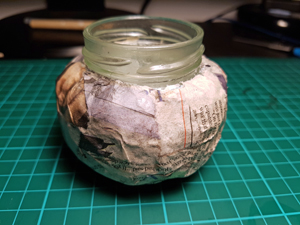 |
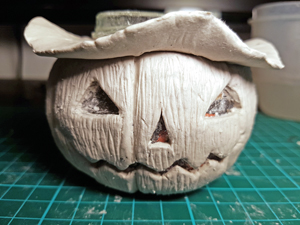
| Cover the jar with clay, taking care not to go higher than the thread. Smooth the surface with wet hands.
Using a cocktail stick, press it firmly into the surface to section the pumpkin into 8. Then use the tip to mark lines going down in the direction of the segments. Using a scalpel or pointed knife, cut out eyes, nose and a mouth in the clay, being careful not to cut into the paper. Use the knife or another modelling tool to neaten the edges of the cut outs. Using a cookie cutter or glass, cut out a circle of clay just bigger than your pumpkin width to form the hat rim. Cut out a hole in the centre the size of the top of the jar so you have a donut shape. Lay over the thread, and press the edge around the top of the pumpkin, pressing down to seal the rim to the pumpkin and keeping away from the thread of the jar. Leave for about 48 hrs to ensure its fully dry |
 |
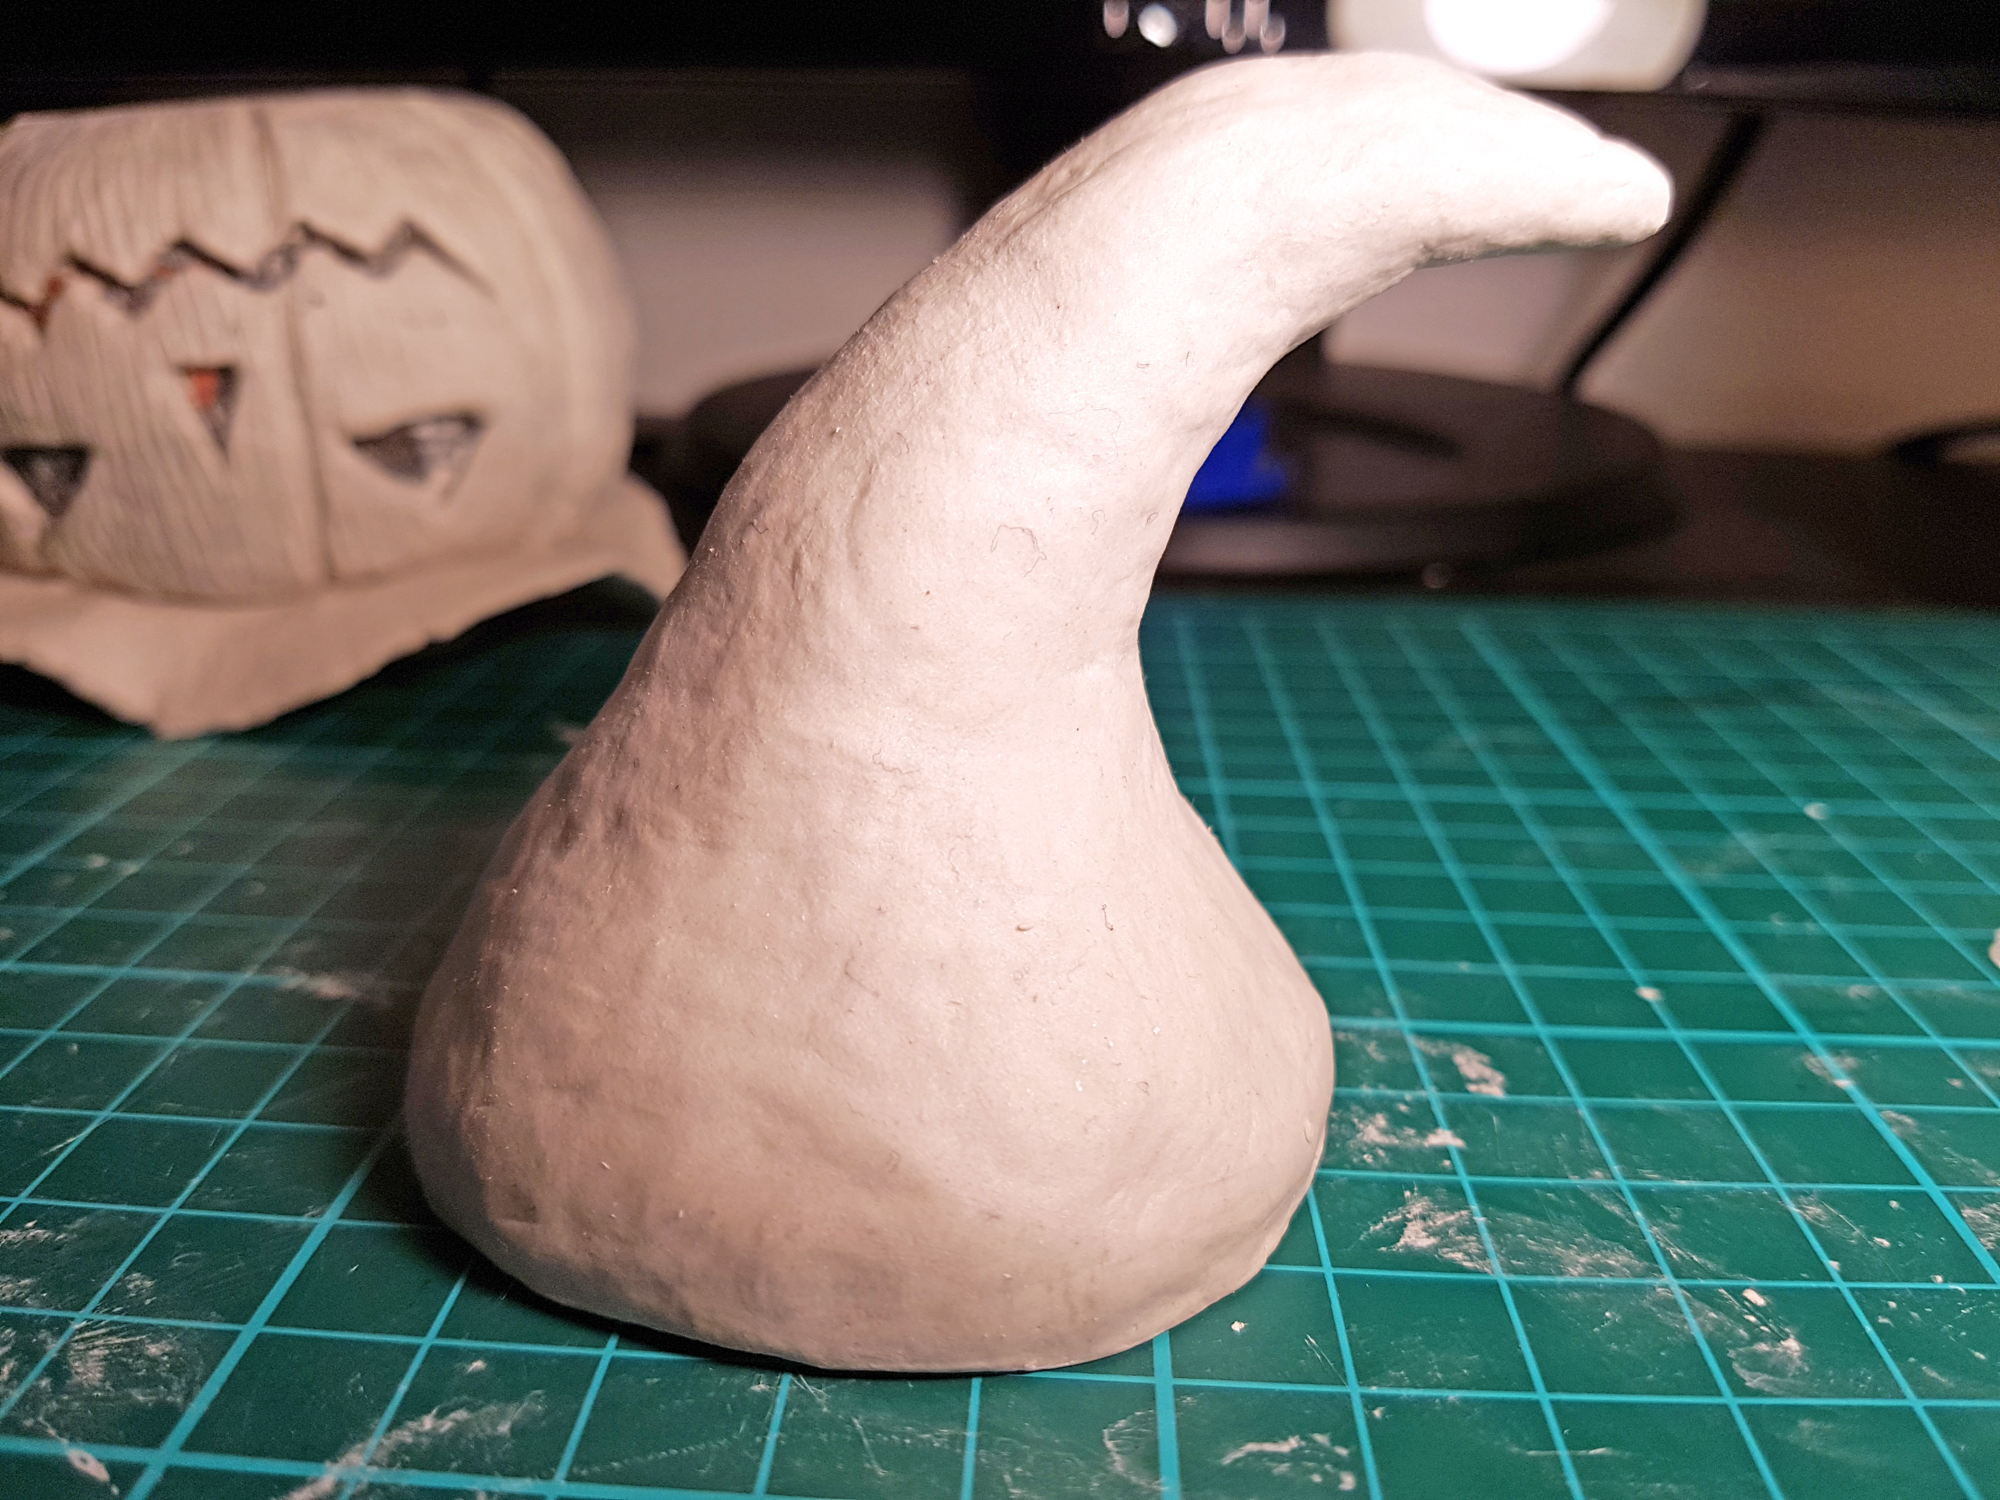
| While the pumpkin dries, work on the lid. Take a length of foil, about 20-22cm. Fold down a third. Take the straight folded edge and carefully attach it to the outer edge of the jar lid with foil tape, wrapping around the lid and ensuring the edge of the foil is no lower than half way down the side of the lid edge.
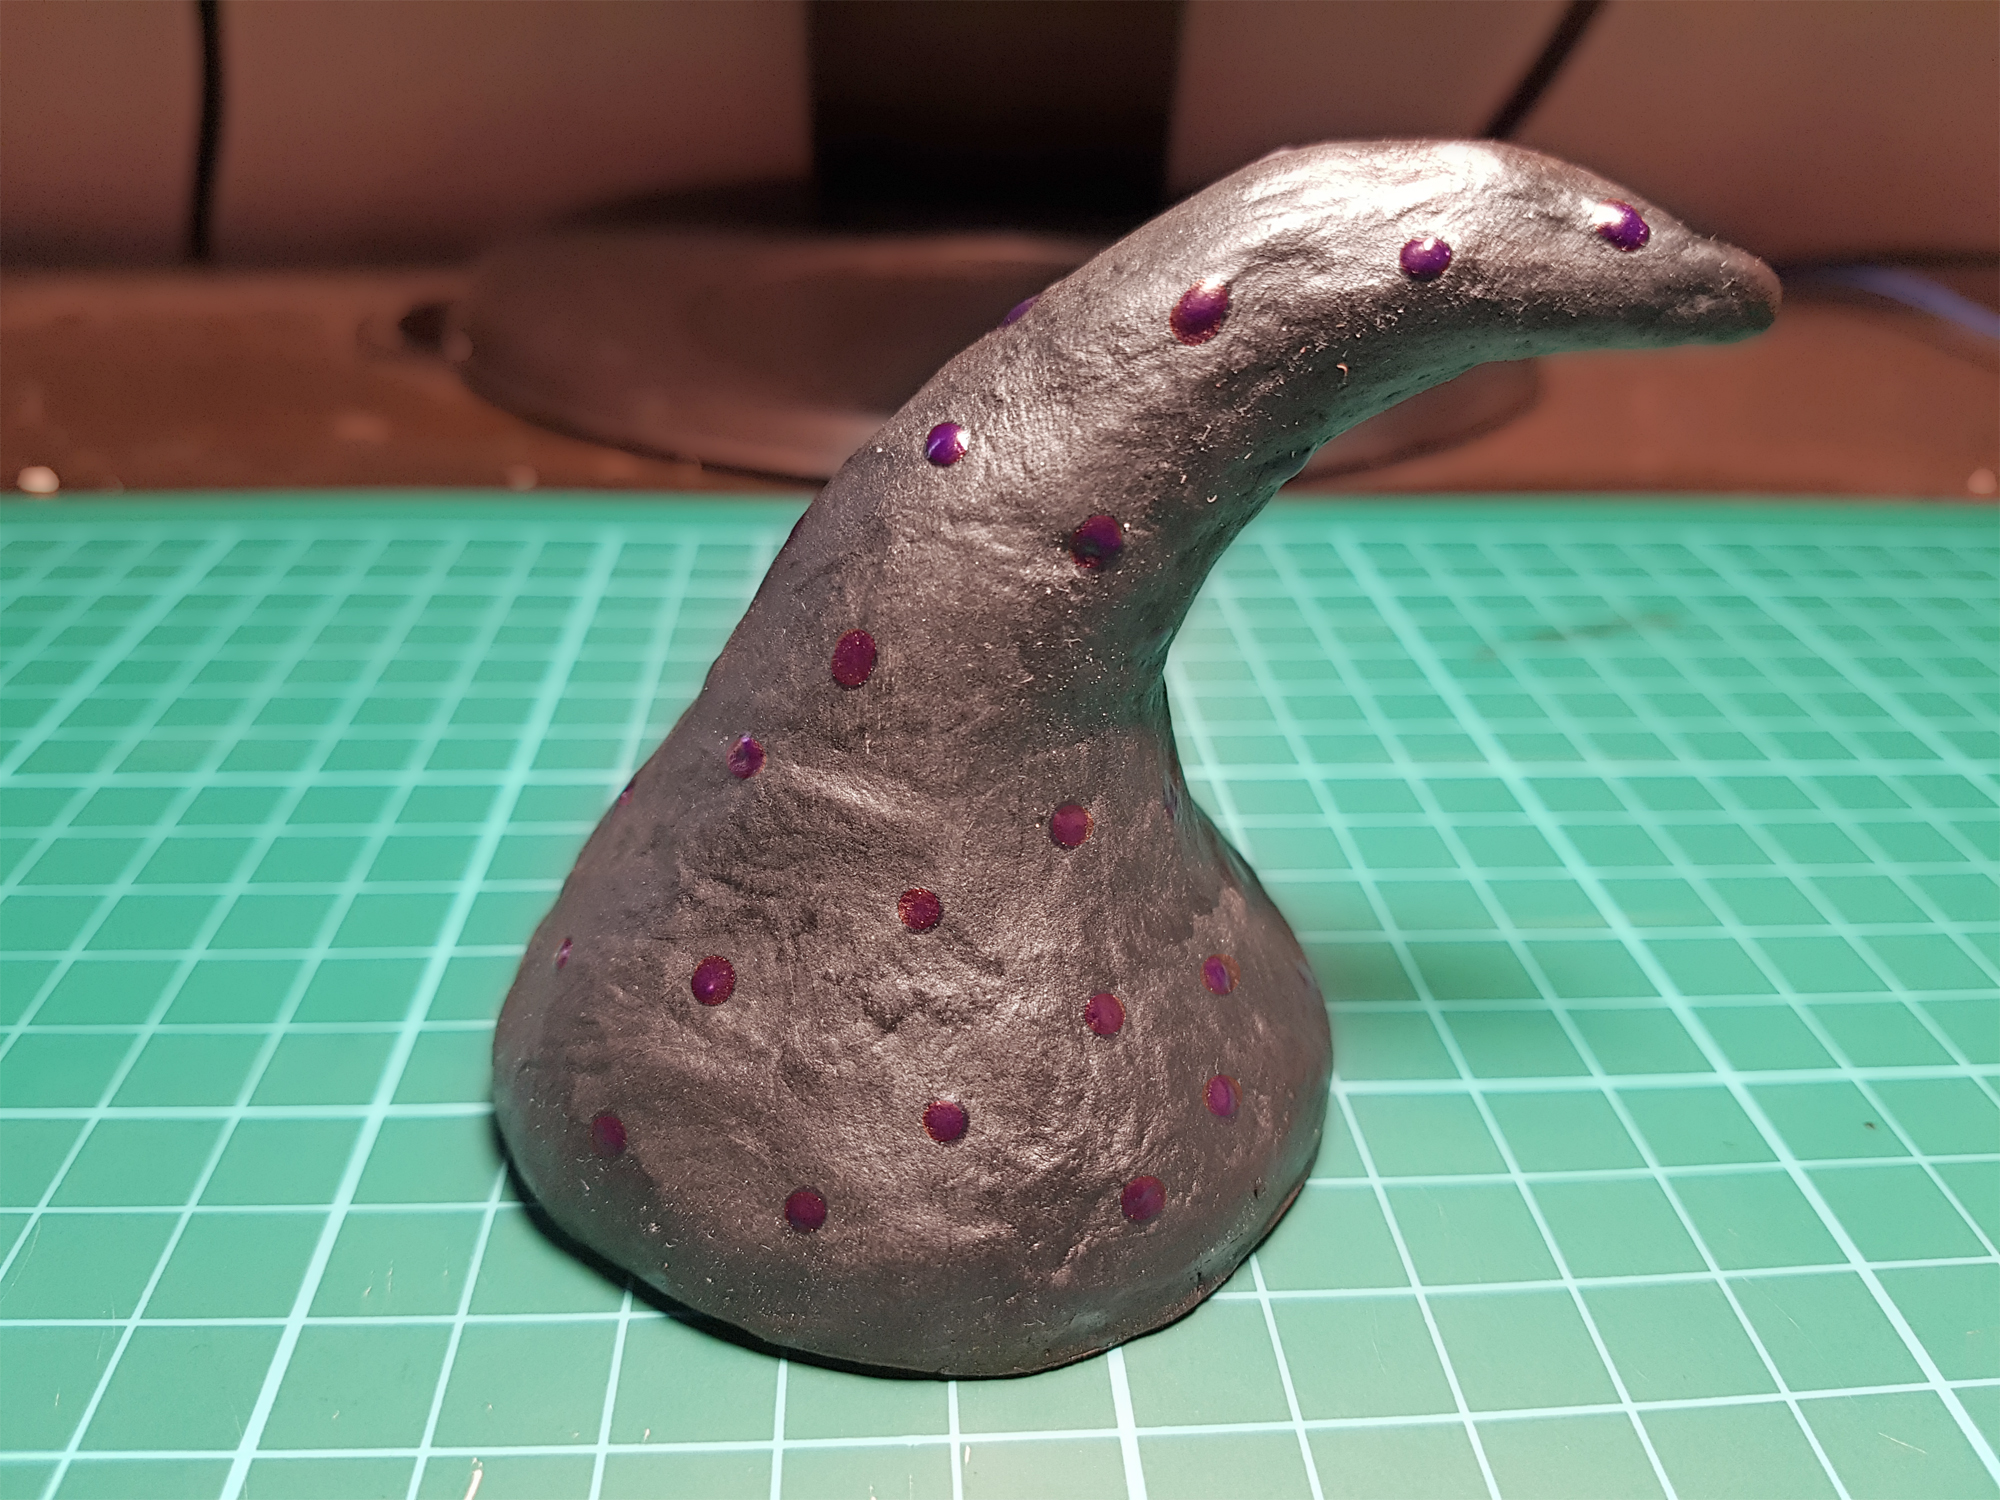
Twist the funnel of foil and keep twisting until the foil is tight. Push down slightly, then bend the top over. Add more foil near the base of the twist to create a smoother gradation. Cover with clay and smooth with wet hands then leave for 48 hrs to fully dry |
 |
| Paint the hat black, and set aside to dry. Meanwhile, paint the pumpkin orange, and paint the underside and topside of the hat rim in black. Put to one side to dry. Acrylic should be dry in about 15 minutes or so, but I would give the pumpkin an hour until the next stage.
I decided to add some purple dots, but unfortunately, once dry they couldn’t be seen. Next time, I will add green or orange. |
 |
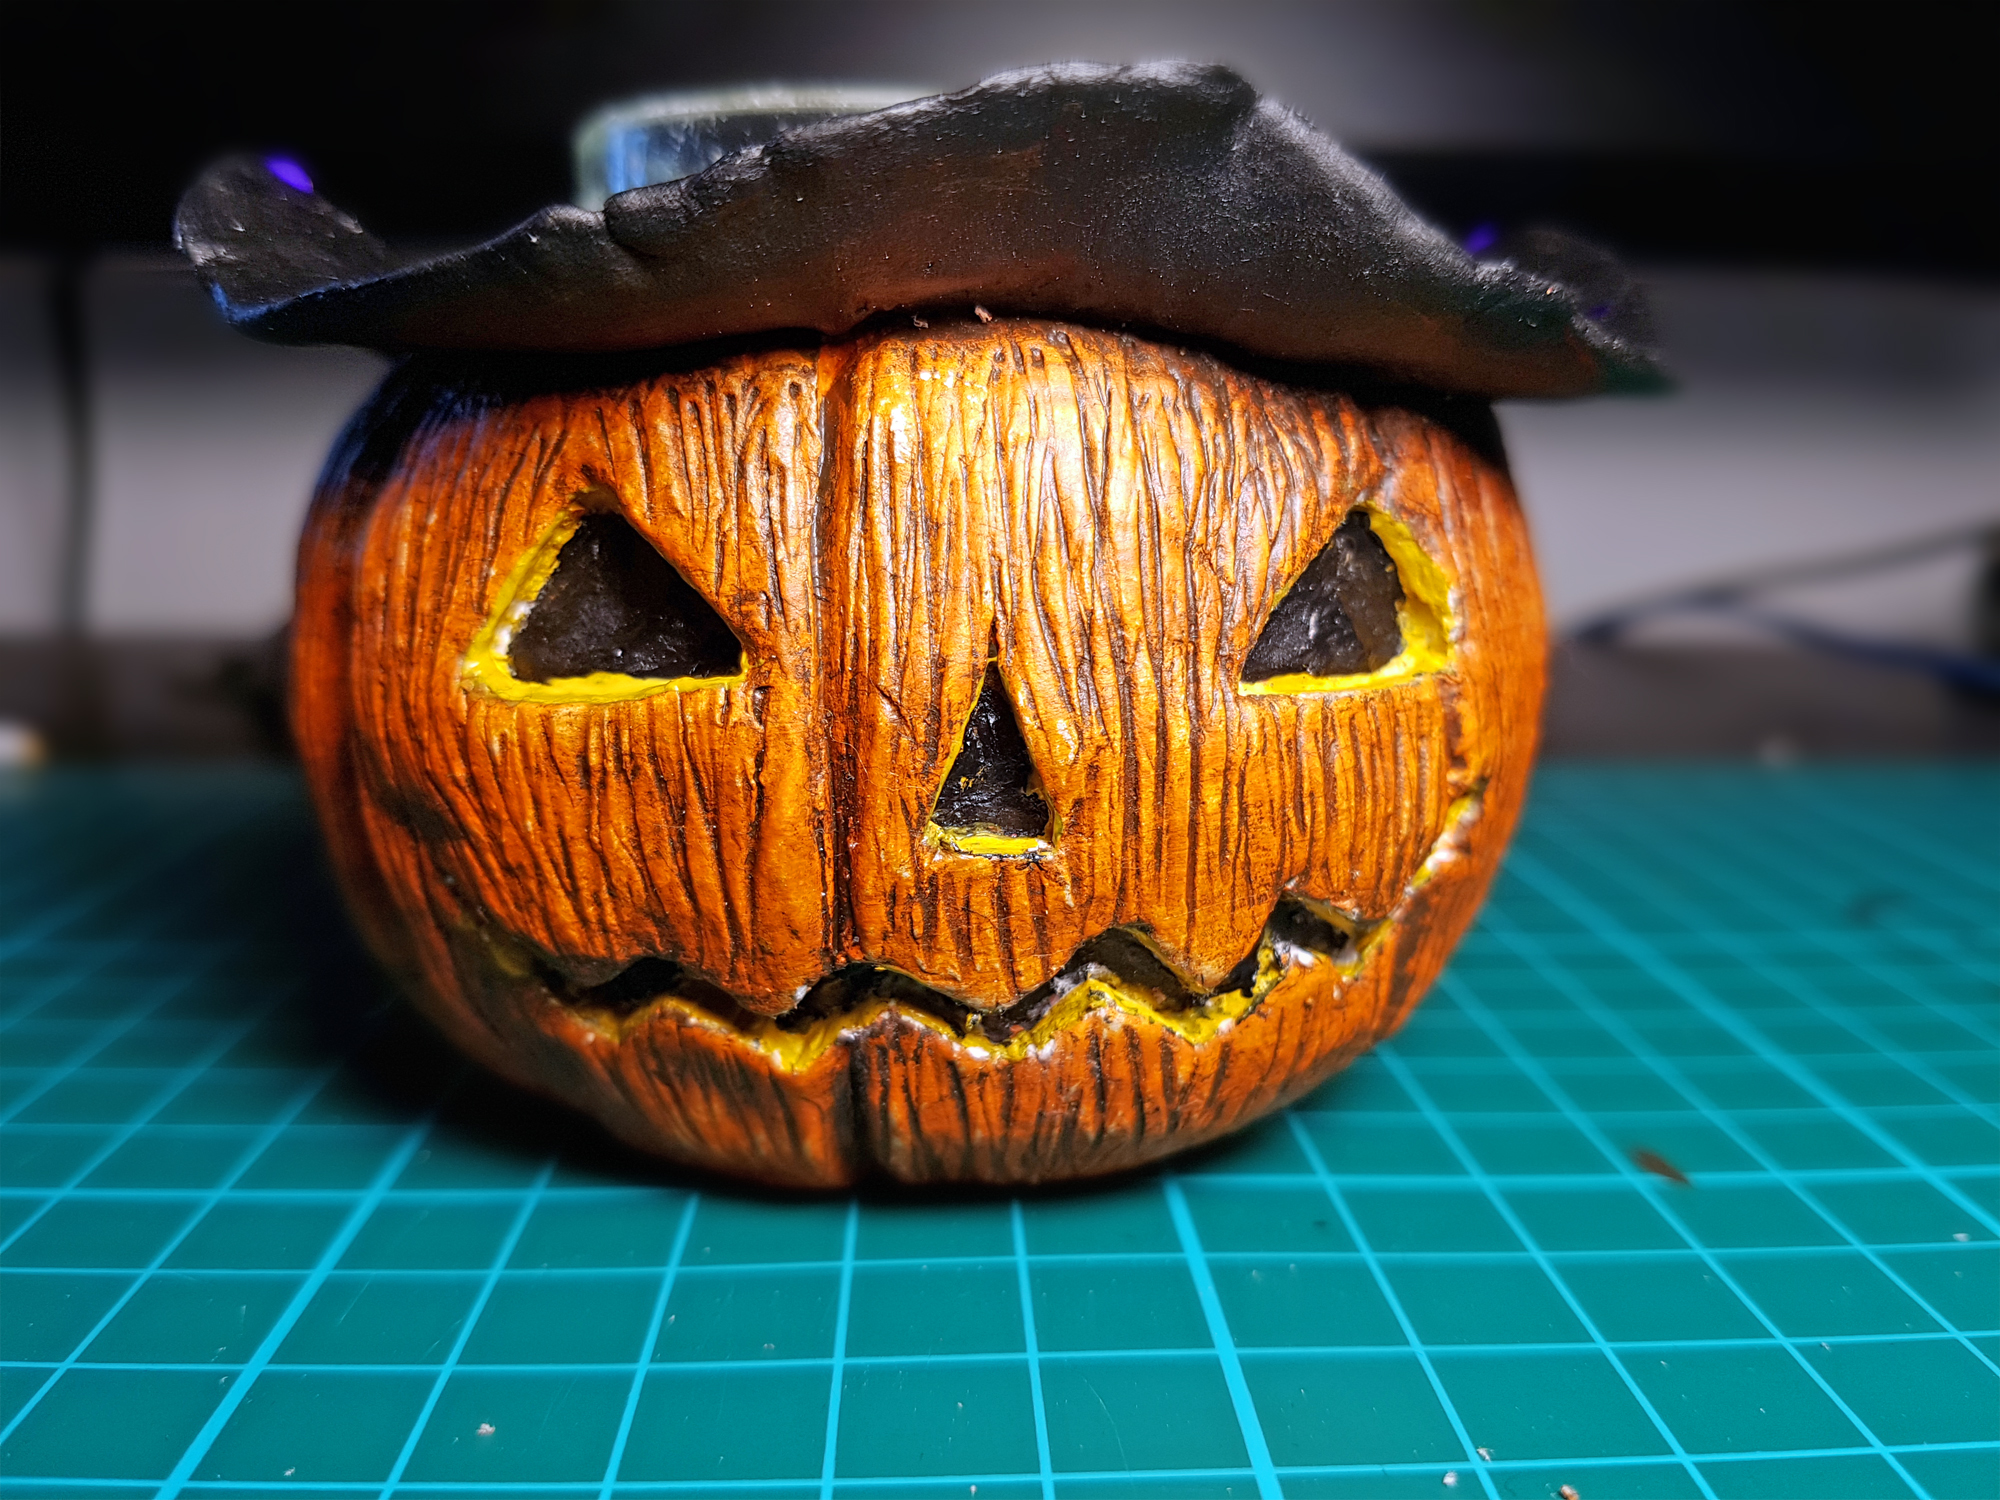
| When the pumpkin is completely dry, put some dark brown acrylic on a wide-ish brush, and paint one section of the pumpkin in even strokes in the direction of the ‘grain’. Using a soft cloth, quickly and gently buff it off with a side to side motion leaving residue in the cracks and crevices to give an aged look. If you want a cuter pumpkin, skip this step. Repeat all over the pumpkin, then allow to dry.
Once the wash is dry, paint the paper mache that is visible black. In the rim of the cut out sections, carefully paint a little yellow to represent the pumpkin flesh. |
 |
| Fill the jar loosely with kitchen roll to protect the inside of the jar and put on disposable gloves. Ensuring you are in a well ventilated space – preferably outdoors – hold the jar by the glass rim and spray with sealant. Spray the hat too, then allow to dry
Take some green ribbon and hot glue one end to the rim of the hat tip. Wrap it around the entire rim, adding one or two more dots of glue to keep the ribbon in place as you go. If you can, have the edge of the ribbon drop slightly lower than the edge so that it covers the slight gap between the lid and the jar. Finally, gently wipe any clay residue from the jar rim using a dampened. Fill the jar with sweets and place the lid on and your pumpkin jar is complete. |
 |

Leave me a comment...