Click here if you’re looking for custom cookies for your event, party or wedding?
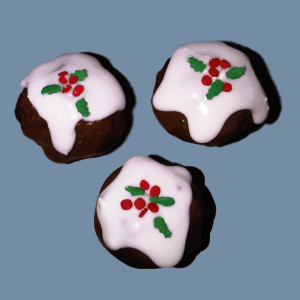
Christmas Cake Christmas Pudding Cake Pops
 Christmas Cake Christmas Pudding Cake Pops. Confused? Then let me explain.
Cake Pops are a trend that was brought world wide attention by the food blogger extraordinaire Bakerella, and these delightful little treats are very de rigueur at the moment.
I made some Snowmen ones last year to include in my Christmas gift hamper, so this year I wanted a different christmas theme… and what is more chrismassy than a plump little Christmas Pudding? One made out of Christmas Cake and stuck on a stick – that’s what!
First crumble a christmas cake into large bowl. Add enough butter cream to bind the cake mixture together, but not so much that it is sloppy.
Next, form the cake into balls, and place on a lined baking tray. When you have created all the balls, place in a freezer for about 1 hour to firm them up. Then take some candy melts of your chosen colour, in this case I chose milk chocolate ones, and melt them in a double boiler or microwave.
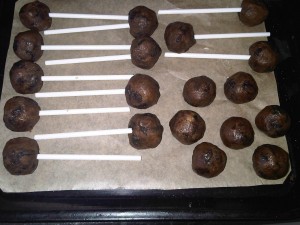
 Dip the end of a lollypop stick into the melted coating, then stick it into the hardened balls of cake mixture. Put back in a fridge for 5 minutes or so. I had a little more cake mixture than lolly sticks, but I decided to just keep them and cover them anyway.
Next, dip each of the cake pops into the coating, and gently tap off the excess. There is a bit of a knack to getting a smooth coating on the cake pops, one I haven’t fully mastered myself, but with a bit of effort you can get a nice smooth surface. It didn’t help that my cake balls had lumps of fruit and peel in, making the surface uneven. Normally, cake pops are made of sponge cake and so a smoother surface is more achievable.
Stand your cake pops in a stand, and allow them to set in the fridge.
Once they are fully set, you can ice them or decorate in whatever way you see fit. For the christmas puddings, I used royal icing and sprinkles. Make some royal icing, but not too stiff – you want it to have a little runnyness. Spoon half a teaspoon of icing on the top of each pop, and push around with the tip of the spoon to give the runny appearance. I then sprinkled some Holly and Berry sprinkles on top and voila!
Give the icing about 12 hours to fully set, then the pops are ready to put in individual bags, ready for your gift hamper.

Leave me a comment...